Estes Calypso (2006)
By Jeff Curtis
Published: 2025-02-16
| Construction Rating: | starstarstarstarstar |
| Flight Rating: | starstarstarstarstar_border |
| Overall Rating: | starstarstarstarstar |

The Calypso only appeared in the 1989 and 1990 Estes Catalog. Nevertheless, the kits show up for sale semi-regularly and can easily be cloned. While it is basically a 3-fin and a nose cone rocket, the addition of a boat-tail and sleek fins make this a good performer with flights over 1000' on a C motor. It is a level 2 build, primarily to the need to form a paper boat tail.
BT-50 Body Tube (9.5")
PNC-50YR nose cone
3.5: BT-20 motor mount tube
Die-cut balsa fins
2 20-50 centering rings
EB-20 engine block
30" streamer
Launch lug
Card stock shroud
18" rubber shock cord
Waterslide decals
I started with the motor mount. The centering rings were a tight fit and were sanded a bit. There is no motor clip with this kit. One of the centering rings must be 2 inches from the end of the motor tube. This allows the boat tail to be aligned with the end of the rocket. The other centering ring is placed near the forward end of the motor tube. Here is where I diverged from the standard instructions. I used a round file to put a notch in the forward centering ring an ran some 100lb Kevlar through the notch. I tied a knot in the end of the Kevlar and glued the tag end to the motor tube. Glue fillets were added to both sides of each centering ring.
The shroud is cut from the printed card stock. Before gluing the shroud together, you should pre-curve the paper shroud. I use a 1/2" dowel rod and rolled the shroud over it a few times until the paper shroud was nicely curved. I then used Aileen's Super Tack Fast Grab glue to complete the shroud. You then put some glue at the end of the motor tune and around the aft end of the rear centering ring. Then push the boat-tail shroud over the end of the motor tube and up to the rear centering ring. This is the trickiest part of the build but nothing too difficult. You can now glue the motor mount into the body tube. The aft end of the body tube should be aligned with the rear end of the after centering ring and butt up against the boat tail.
The fins are die cut. The cuts don't show up as well as the laser cut fins we are used to now. I flex the balsa a bit to widen the die cuts and ensure I am cutting out the fins properly. Unlike most rockets, the fin roots are not straight but have an angle to follow the boat tail. I recommend gluing one fin fin along the seam line of the boat tail to hide the seam. Then use the fin guide to mark the body tube for the remaining two fins. Again, Aileen's fast grab glue was used to attach all three fins. I highly recommend this glue for attaching fins to low-power rockets. No waiting a minute for the double glue method or worse, holding the fins until they grab. Apply fillets ( I use Titebond II for this), along the root edges of the fins, including the edge along the boat tail.
At this point you just need to pull out the Kevlar shock cord and attach to the nose cone. The nose cone is in 2 parts. Before gluing the nose cone base into the nose cone, check if you need to add any nose weight for balance. If needed, I dump in a few BB's and mix in some 5-minute epoxy. You probably won't need any with the Calypso, as the center of pressure is aft of the front end of the fins, close to centered between the centering rings. Here wa smy 2nd deviation from the plans. With the fins extending well past the end of the rocket, I went with a parachute as these fins will be easily cracked.
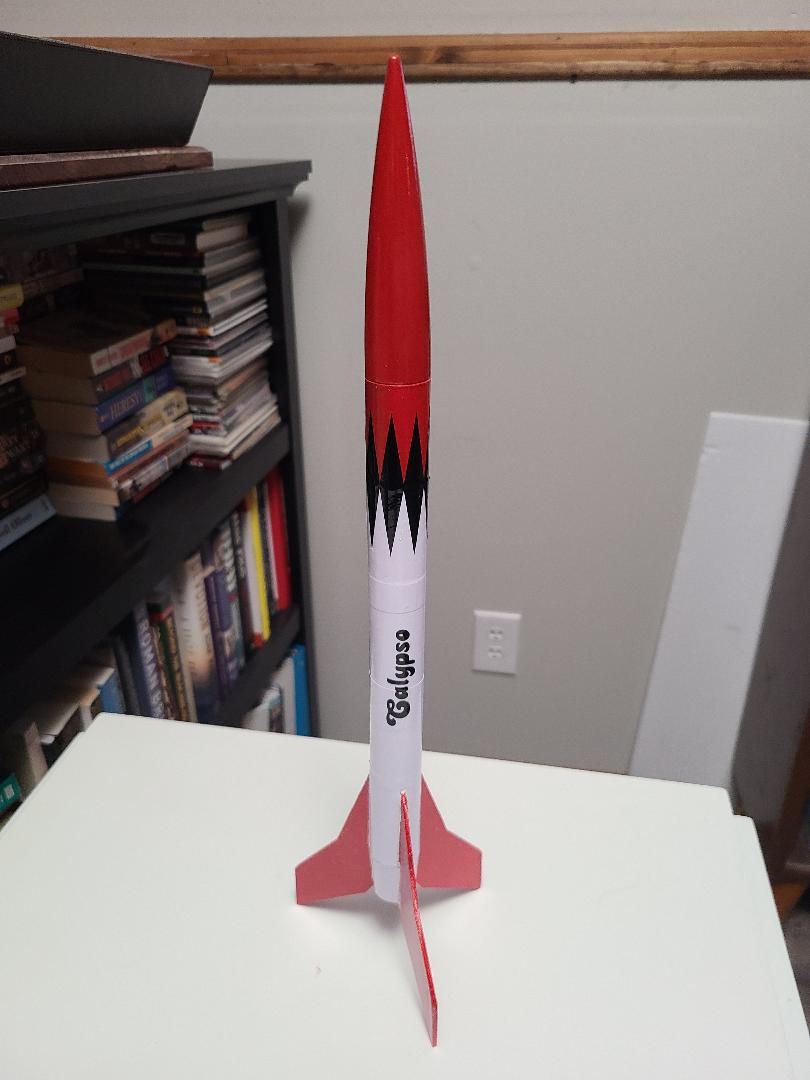
You are now ready to paint the Calypso. The fins and top third of the body tube are painted red. Conventional wisdom is to paint the lightest colors first, then mask and paint the darker color. I prefer to paint the fins first. It's easy to then mask off the fins. Once the fins are painted red and have been masked off, shoot a bit of red along the tape lines. This seals the edge and prevents the white from seeping under the tape. If you still get some seepage, so shoot a small amount of red paint in a small paper cup and us a brush for some touch up. The black diamond decals on the Calypso cover the seem between the white and red paint on the body tube and cover any minor blemishes. All in all, a pretty easy paint scheme, which I appreciate. Yet it still results in a nice looking rocket. I misplaced my decals and ordered replacements from Stickershock. Mark usually doesn't make decals this small from vinyl but they worked well and look great. Of course, as soon as I received by Stickershock order I found the original decals. Given the age of the original decals, replacing them with vinyl wasn't a bad thing.
My Calypso came in at 1.5 ounces. Estes says it should weigh .99 ounces. I suppose the parachute and barrel swivel added some weight and I tend to paint heavy.
Open rocket shows the 1.5 ounce Calypso should do 189' on an A, around 480 on a B and slightly over 1000 on a C. I went with an A for the first flight. There was little wind, so it went straight as an arrow. I thought it got over 200' but will definitely use B motors from now on. Not sure the Calypso will remain visible on a C. Descent seemed reasonable but it still ended up with a cracked fin. It was an easy fix.
The Calypso is a sharp looking 3FNC rocket. The boat tail throws a bit of a twist into the build but anyone can build this rocket. When they come on the market, the price is usually reasonable, but with the plans and fin templates available on Jim Z's plan site, it makes an easy clone. Decals are available if you prefer not to print your own. I definitely recommend adding the Calypso to your rocket collection. It's a classic old Estes rocket.
Flights
Estes Calypso Reviews
 |
 |