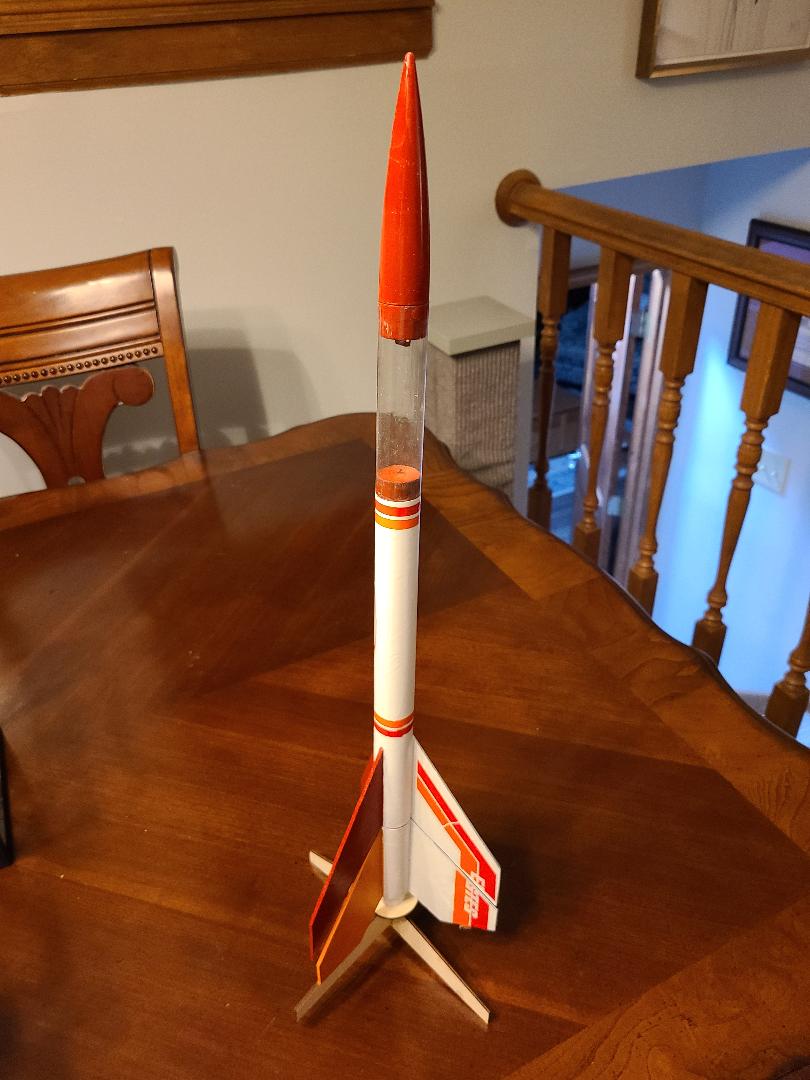
Estes Hercules Two-Stage
By Jeff Curtis
Published: 2025-04-10
| Construction Rating: | starstarstarstarstar_border |
| Flight Rating: | starstarstarstarstar |
| Overall Rating: | starstarstarstarstar_border |
| Manufacturer: | Estes  | |
| Diameter: | 0.9760 inches | |
| Length: | 21.6000 inches | |
| Skill Level: | 3 | |
| Style: | Multi-Stage |
I ran across this rocket as part of my quest to build all the rockets from the 1989 Estes catalog. It's a sleek 2-stage rocket with a payload bay in the sustainer. It was in production from 1982-1995 so it's not particularly rare. It's also not difficult to clone and an image of the decals is available on the Jimz plan site. Motors are taped together for direct staging.
BT50 booster tube
BT50 Sustainer tube
BT-50 coupler
2 18mm motor mounts
PNC-50Y nose cone
Clear payload tube
3/32" die-cut balsa fin sheet
Thrust ring
BT50 nose block
Screw Eye
Rubber band shock cord
12" parachute
Waterslide decals
I started off building the two motor mounts. Care needs to be taken with the placement of the centering rings, A coupler is used to fit the booster and sustainer together and you need to ensure there is room between the top centering ring on the booster and the bottom centering ring in the sustainer for the coupler.
When gluing the motor mounts into the body tube you want the motor tube flush with the front of the booster tube and with the rear end of the sustainer body tube. I also like to modify the shock cord mount and attach a Kevlar cord to the motor mount, I use a needle file to create a grove big enough for the Kevlar to go between the motor tube and centering ring.
Next up I cut out the fin placement guide and mark the body tubes before I glue in the motor mounts. The fins need to be aligned as the fin decals cover a set of booster and sustainer fins and are then cut between the fins. So, keep the booster and sustainer together when marking the fin lines. While the fins dry, I insert the screw eye into the nose block. I use 5-minute epoxy in the screw hole and then dab epoxy around the eye screw shaft, bonding it to the nose block.
Now it's time to paint. One booster fin is orange and the matching sustainer fin is red. The other 4 fins are white. When fins are a different color than the body tube I like to paint the fin and the mask it off. I find it easier to mask the fins rather than the body tube. I use Frog low tack tape for masking. I've had normal Frog tape lift the paint. After masking the fin, I shoot paint along the tape-body tube line. This seals the edge of the tape and prevent paint seeping under the tape. I also paint the nose cone and nose block red at this point. Paint the rest of the rocket white. I then glue the nose block and nose cone into the clear payload tube. I used JB Weld clear 5-minute epoxy although Bob Smith Plastic Cure CA will also work. Remove the masking tape from the fins. If you did have any paint seep, then I spray a bit of paint in a paper cup and touch up with a paint brush.
Attach the shock cord to the screw eye in the nose block. Build the parachute and attach it to the screw eye with a snap swivel. Finally, apply the decals, As mentioned earlier, the white fins have decals that cover the booster and sustainer fin pair. I like to let the decals dry before slicing them between the fins.
I've flown the Hercules once on a B6-0/A8-5 combination. Tape the motors together with scotch tape and insert into the booster. Then slide into the sustainer. Staging went fine. This provided some impressive altitude but the deployment of the parachute was late. An A8-3 would be about right for the sustainer. The 12" parachute did fine.
If you like two-stage rockets this one is recommended. Despite being an older kit, it comes up for sale fairly often and can also be cloned. There is nothing too tricking with the build as long as you take care with the booster-sustainer joint. Just follow the directions and you will be fine.
Estes Hercules Reviews
Sponsored Ads


")

 - 47776017535")


 , White")


 |
 |