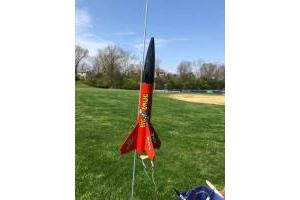
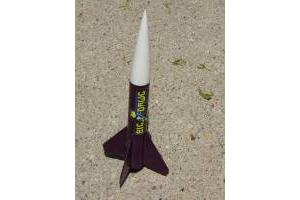
Estes - Big Dawg Kit
| CP Method: | Rocksim/Rocksim |
| CP Position From Front: | 10.68 inches |
| Decals: | Self-Stick |
| Designer: | Matt Steele |
| Diameter: | 1.33 inches |
| Fin Material: | Balsa |
| Length: | 12.80 inches |
| Manufacturer: | Estes  |
| Model: | 2151 |
| Motor Size: | 18 millimeters |
| Nose Cone Material: | Plastic |
| Original Price: | $8.99 |
| Plan (Estes Instructions): | https://www.estesrockets.com/media/instructions/002151_BIG_DAWG.pdf  |
| Plan (YORP): | http://www.oldrocketplans.com/estes/est2151/est2151.htm  |
| Power: | Low-Power |
| Product Type: | Kit |
| Production Years: | 1998-2000 |
| Recommended Motors: | A8-3, B4-4, B6-4, C6-5, C6-7 |
| Recovery: | Parachute |
| Skill Level: | 1 |
| Status: | Out-Of-Production |
| Style: | Sport |
| Weight: | 1.60 ounces |
Reviews
- Estes Big Dawg By Bill Eichelberger
The Big Dawg was one of those rare kits from Estes that actually turned out to be quite a bit more than the sum of its parts. While it looks like a typical late 90's 4FNC rocket at first glance, it's interesting in that it's one of the earliest Estes kits that utilized through the wall (TTW) fin attachment. The Big Dawg builds quickly and results in a sharp looking, sturdy little 18mm ...
- Estes Big Dawg By Mike Olson
I built a Big Dawg recently, and flew it when my son's Cub Scout pack was invited to Tripoli Nebraska's October launch. Construction was straight-forward for a through-the-tube rocket. Estes' instructions were very good, however, it appears that the motor tube has been shortened since the illustrations were drawn. They show a three inch tube. The included tube measured 2 3/4 inches, and as a ...
- Estes Big Dawg By Doyle Tatum
I like this kit. It is extremely easy to construct, yet is very attractive and sturdy. The through-the-wall fins reached to the motor mount per the instructions, which are precise. I added a Kevlar cord, tied to the motor mount, in lieu of the Estes shock mount. I did decide to build this one stock and maybe another one in the future with a 24mm mount. I used 5 minute epoxy throughout. The only ...
Rocksim Design Files
Plans and Instructions
Thanks to ...
- Steve Lindeman for Updating Product Attributes
 |
 |
Flights
 |
 |

