New Way Space Models Check-It
New Way Space Models - Check-It {Kit}
Contributed by Bill Eichelberger
| Construction Rating: | starstarstarstarstar |
| Flight Rating: | starstarstarstarstar_border |
| Overall Rating: | starstarstarstarstar_border |
| Published: | 2016-03-23 |
| Manufacturer: | New Way Space Models  |
| Style: | Odd-Roc |
 Brief
Brief
Back in the infancy of my BARdom, I found a square tube that a component for a printer I used came in. At the time, every tube I came in contact with was fair game for potential rocket designs, and I thought up a doozy for the square tube. Several attempts with balsa blocks and sandpaper didn't turn out a product that looked anything like a potential nose cone, and in fact, robbed me of much needed rocket funds that could have been used elsewhere, so I abandoned the Bail Out Blockhead. More than a decade later I received the Check It kit as a consolation gift after the most murderous afternoon of rocketry that I'd experienced in my 35 years in the hobby. Thanks again, Rick.
Components
- Balsa nose cone
- Square body tube
- 4 square tube fins
- 2 square centering "rings"
- 13mm engine mount kit
- Screw eye
- Washer
- Launch lug
- Launch lug standoff
- Xtra small recovery kit
- Sandpaper kit
- Glue applicator
- Decal sheet
Construction
Outside of a Custom Razor, (another yellow and black bird I'm unabashedly fond of,) this may have been the easiest build ever. The Check-It is all flat surfaces and squared up edges and I used Titebond II wood glue in all areas of construction. I attached the cube fins first, taking care to square them up as much as possible and doing so while the main body tube stood upright on my cutting board. While this dried I constructed the engine mount, which consisted of square centering "rings" that slipped perfectly into the body tube. The launch lug, a smaller piece of square tubing, was placed on a standoff and glued to the side of the rocket so that the rod fits in through one of the cube fins. Other than filleting the cube fins and gluing the screw eye into the nose "cone" this pretty much wrapped up construction.
Finishing
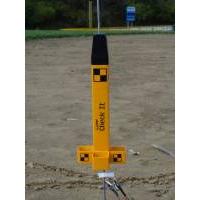
The Check It body tube is unlike a typical round tube in that the surface is somewhat more grainy than typical. I used the old thinned Elmers wood filler trick, but after two coats it was obvious that a glass-like finish was going to be beyond my patience, so I settled for a decent look. Two rounds of Elmers followed by two rounds of sanding, then two coats of Valspar primer. I wasn't wild about the shade of yellow offered by Valspar, and I found a can of School Bus Yellow at Tractor Supply instead. This paint went on quite thick and two coats did a nice job of hiding the fact that I'd skimped some on the sanding. The nose cone got a coat of Valspar gloss black. I gave the decals a couple of coats of Testors decal bonder and finally applied them the night before the third flight. They applied nicely and looked great. (I'm a sucker for yellow and black rockets.)

Flight
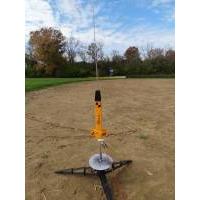
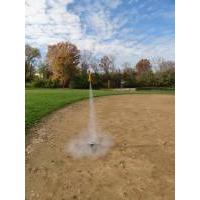
First flight was both nekkid and underpowered, but the winds were slightly too strong for me to feel confident with an A3 or an A10. For that reason I chose an 1/2A3-2, which didn't move the needle. It was another of my near-patented "I can throw it that high" flights to about 100'. Recovery was a little lethargic, but the chute filled fifty feet above the field. That didn't make much of an impression on me at the time, but it would in future flights.
Second flight came after the paint job and after a trip to Hobby Lobby for A10 motors. The flight itself was much more entertaining, nicely stable and topping out at the 250-300' mark, but the ejection charge sounded weak and didn't allow the chute to clear the body tube. Recovery was a flat spin to the grass in the outfield. The chute had just begun to pull out before it hit the ground. Dog barf was just enough to take the brunt of the ejection charge, and the parachute actually just fell out when I picked the rocket up.
Third flight was finally in full livery, with all decal work having been finished the night before the launch. Unfortunately I forgot about the first 1/2A flight and went with another for this flight. Like the first time it was a mistake, falling into the "I can throw it that high" category. Unfortunately for the second time in three flights I experienced a recovery issue with the parachute failing to clear the body tube at the behest of the ejection charge. It eventually did again pull free, but too close to the ground to be of any good. Luckily the rugged construction and outfield landing made a grass stain the only damage. I shouted it out.

Summary
Pros: Quite possibly the perfect small field rocket. Mini engine power and the big blunt nose guarantee that you won't overfly the field.
Cons: Mini engine ejection charges have not shown themselves strong enough to launch the laundry with anything approaching dependability.
 |
 |
Flights
Sponsored Ads
 |
 |


