Excelsior Rocketry Der Fat Max Plan
Excelsior Rocketry - Der Fat Max {Plan}
Contributed by Bill Eichelberger
| Construction Rating: | starstarstarstarstar |
| Flight Rating: | starstarstarstarstar |
| Overall Rating: | starstarstarstarstar |
| Published: | 2013-08-01 |
| Manufacturer: | Excelsior Rocketry |
 Brief
Brief
I always loved the versatility of the Estes Fat Boy, and over the years I bought quite a few of them for different projects, most of them of the Goony persuasion. When a fellow club member decide to move away from low power and offered one for sale from his stash, I jumped at the chance to pick it up with this project in mind. Under normal circumstances all of the Fat Boy kit is used in the construction of this rocket except for the fins, but I decided to make the rocket 24mm powered since the field I flew on most regularly was large enough to handle it.
Components
- PNC-80BB nose cone
- BT-80 (slotted)
- 3/32" basswood fin stock
- 24mm engine tube
- CR-5080 centering rings (2)
- engine hook
- 36" length Kevlar shock cord
- 36" length 1/8" sewing elastic shock cord
- large snap swivel
Construction
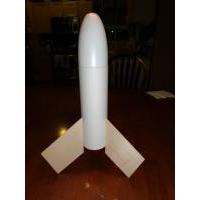
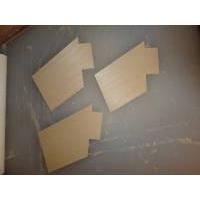
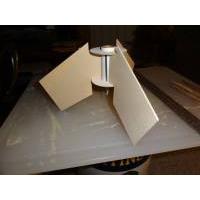
I've flown Fat Boys on both 18mm and 24mm power in the past, but was never entirely comfortable with watching my piggish builds claw their way to minimal altitude, so I'd decided from the start that that this was going to be 24mm power. I guess the instructions for the Fat Boy were adequate, but I'd yet to find myself referring to them in all the builds I'd done through the years. I still had a set of 5080 centering rings left from an earlier Semroc purchase, so this played into my plans perfectly. I went with 3/32" basswood for the fins since I had to cut new ones anyway, and cut them with purposely shortened TTW fin tangs to accomodate the switch from 18mm to 24mm power. I cut the tangs purposely short, then sanded them to fit, dry-fitting them as I went and leaving a gap of about 1/16" to allow for the thickness of the body tube. A 36" length of Kevlar was tied around the body tube just behind the forward centering ring, and glued into place. A slot was cut in the centering ring, which the Kevlar was threaded through before being glued into place on both sides of the ring. This attached to a 36" length of 1/8" sewing elastic and gave me 6 feet of shock cord to guard against the possibility of the nose cone rebounding into the top of the tube or fins. A ring of glue was run around the inside of the body tube just above the slots and the motor mount was slid into place, taking care to line the front and back rings up with the slots to allow for the fins to be attached. The mount was also glued in at the rear ring and allowed to dry. Once the motor assembly was in place, I moved on to the fins. A thick layer of Elmer's Wood Glue was run along the tab that would wind up against the motor tube. The tabs were carefully worked into the slot and seated against the motor tube, then the fin was straightened and held in place with the Estes fin guide until dry. Fillets were made using wood glue and the result is a fairly bulletproof low power bird.


Finishing
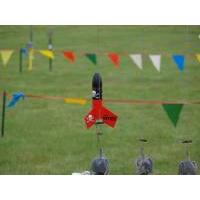
With this rocket being based on the two color Red Max kit, finishing was a pleasure. The completed rocket was primed, then the tube spirals and minimal basswood grain were eliminated with the standard thinned Fill & Finish treatment and sanding. After another coat of primer, the body was sprayed with Testor's bright red gloss and the nose cone with gloss black. The Excelsior decals were treated with three light coats of Testor's decal bonder and went on without a hitch.
Flight
The first flight of the Fat Max took place on a windy, raw Saturday at the TORC cornfield in South Charleston, Ohio. I'd bought a pack of D12-5 engines with a Hobby Lobby 40% off coupon with this rocket in mind. The Fat Max left the pad and headed sharply into the wind. Much of the altitude was eaten up by the trip into the wind and I'd guess that it attained a height of 350' before it began to tip over and the ejection charge fired. I'd hoped the stiff breeze would bring the rocket back closer to the pads, but the 12" chute brought it in fairly fast and a lot deeper in the field than I'd anticipated. Recovered after a long hilke without damage.
A second D12-5 was made at NARAM 55 in conditions that were the complete opposite of the first flight. This time the winds were calm, so the flight was high and straight, topping out somewhere near 800'. Once again the ejection charge fired as it was nose down, but this time the drift was minimal, and the Max landed on the forbidden area just behind the sport range. Plans at this point are to try a C11 the next time out. This bird does "low and slow" well enough that it can't be discounted for a B6-4 Field flight if conditions are right.
Summary
Pros: Any time you can add a new Max to the family is a good time indeed. Great looking bird with the proven Fat Boy flight record.
Cons: The Fat Boy has been inexplicably dropped from the Estes lineup.
Other Reviews
- Excelsior Rocketry Der Fat Max (Plan) By Ron Wirth (September 1, 2009)
Brief: The Der Fat Max is another Goony Retro-Bash plan set from Excelsior Rocketry. While it might not be the typical size of a Goony, it sure looks and feels Goony to me. As with the other Goony Retro-Bash rockets available from Excelsior, this is a kit-bash where you get receive the plan set, decals, and fin pattern. For this rocket you need to supply a Fat Boy kit and balsa for ...
#Related Reviews
- 2 Fat By Geof Givens
Brief: After a spell of creative scratch rocket projects, all my fun ideas seemed to have dried up. Looking around the workshop, I smiled at good old Fat Boy: both my kids and my favorite rocket. He's always good for an exciting flight and safe recovery. Why not court disaster by trying to improve ...
- Fat Boy to AttaBoy Modification By Tad Scheeler
The ATTABOY is a boattailed FATBOY with 24mm upsized motor mount that can be flown in two different configurations--both with and without upper payload tube. Modifications: I was inspired by Michael Bade's " Big Bad V-2 Daddy ", Kevin Johnson's " OY!FATBOY ", and David Fergus' " Boattail FATBOY ...
- Modification 24mm Fat Boy By Morgan Hendry
This project began when I read several posts from rec.model.rockets on placing a 24mm motor mount in a Fat Boy, normally a 18mm kit. I first looked at the instructions and made a list of what I needed to do. Replace the 18mm motor tube with a 24mm one Make bigger motor mount with modified ...
- Modification Fat Boy - 24mm By Morgan Hendry
This project begun when I read several posts from rec.model.rockets on placing a 24mm motor mount in a Fat Boy, normally a 18mm kit. I first looked at the instructions and made a list of what I needed to do. Replace the 18mm motor tube with a 24mm one Make bigger motor mount with modified ...
- Modification Fat Boy - 24mm By Colin Westgarth-Taylor
An Estes Fat Boy modified with a 24mm MMT for D and E motors. External dimensions are stock. These modifications change one of Estes best packaged kits into a true performer. Modifications: Construction sequence was pretty normal for a MPR capable rocket: forward CR epoxied to the MMT, shock ...
- Modification Fat Boy - 29mm By Scott McLeod
An Estes FatBoy modified with a glassed body tube, 29mm MMT and G10 fins for F, G, and H motors. External dimensions are stock. Best "bang-for-buck" rocket that I ever built. Modifications: When glassing the tube, I used a long section of PML 2.6" coupler tube wrapped in greaseproof ...
- Modification Fat Boy to Schnoz By Larry Brand
The problem with overpowering a "stubby" design like the C-powered Estes Fat Boy with heavier engines is the CG dilemma -- the more power, the more nose weight is needed to keep the CG in limits, negating the Oomph you thought you were adding. I have modified Fat Boy for F-power with a ...
- Modification Super Baby Bertha By Kevin Johnson
Took a Fat Boy kit and added Big Bertha like fins to make a Super Baby Bertha. Modifications: NARHAMS held a Fat Boy theme sport launch this month, and I was looking for something different to do with my last Fat Boy kit. I had just finished repairing my Super Big Bertha when inspiration ...
- Modification Two-Stage Fat Boy By Kevin Johnson
Kit bashed two Fat Boys into one two-stage rocket. Modifications: After building the sustainer per the instructions, I started the booster by building the motor mount/center rings. Using the completed mount as a guide, I marked the aft end of the second BT and cut it down just in front of ...
- Scratch BoatTail Fat Boy By David Fergus
Brief: Modified BoatTail FatBoy with a D engine mount, sturdier construction throughout, and better fly-ability with a boat tail. The basic dimensions of a stock Fat Boy were maintained for both body length and fin shape and size. Modifications: Body Tube: Cut the main body tube 5 1/8 inch ...
- Scratch Fat Boy (7 x 18mm Motor Eater) By Dick Stafford
This Fat Boy flies on seven 18mm motors. Modifications: Here is what I changed: The base of the cone was cut off The stock centering rings were not used Additional 18mm motor tubes were added Parts list: Estes Fat Boy kit 18mm tubing for the 6 additional motor ...
- Scratch Fat-Ass-Tron Sprint By Jim Sekol
Fat-Ass-Tron Sprint The Fat-Ass-Tron Sprint: The F-A-T Sprint is a combination of the Estes Fat Boy, and the Astron Sprint. It was originally created to address one of the Fat Boy's inherent design flaws, that being ...
Related Products
 |
 |
Flights
 |
 |


