Rocketarium Retro Rebel
Rocketarium - Retro Rebel {Kit} (RK-RETRO) [2013-]
Contributed by Richard Holmes
| Construction Rating: | starstarstarstarstar_border |
| Flight Rating: | starstarstar_borderstar_borderstar_border |
| Overall Rating: | starstarstarstarstar_border |
| Published: | 2013-08-29 |
| Diameter: | 3.67 inches |
| Length: | 12.00 inches |
| Manufacturer: | Rocketarium |
| Skill Level: | 3 |
| Style: | Odd-Roc, Sport |
 Brief
Brief
I bought the Retro Rebel kit for our club's annual Odd-Rocs theme launch. It's certainly odd.
There is a 24 mm body tube with an 18 mm motor mount. Instead of a nose cone fitting into the body tube there's another short length of 24 mm tube with a coupler. Each 24 mm tube is surrounded by an "exoskeleton" made of 1/8 plywood, consisting of four vertical pieces and several horizontal discs. On the lower part the vertical pieces flare out to become fins. The whole thing looks like a cross between a 1950s cartoon rocket and a fish skeleton.
There is a 15" parachute for recovery. The kit includes a Nomex heat shield.
Components
18 mm motor tube; 2 centering rings; motor block; engine hook; two 25 mm body tube sections with coupler; plywood bulkhead; screw eye; 9 1/8" plywood discs; 12 1/8" plywood nose, side, and fin pieces; 1/8" launch lug; plastic 15" parachute kit; Kevlar shock cord; Nomex heat shield.
Construction
I had one issue when building; the aft centering ring is supposed to have a piece removed to accommodate the engine clip. When I did that the CR started to delaminate. I tried using some CA glue to stabilize it but when I went to install the motor mount it came apart and the motor mount ended up off center. (Partly my fault for not dry fitting the motor mount first; I think the CR could have used a little sanding.) I ended up buying parts to rebuild the body tube. This time I applied CA to the whole CR before cutting it and things went much better.
I found it easiest to build the "exoskeleton" by dry-assembling it, then removing one vertical piece, applying glue, restoring the vertical piece, then repeating for the other three vertical pieces. After a little sanding to smooth edges the plywood pieces went together easily.
I thought this kit was easier than I expected given its Skill 3 rating.
Finishing
As advised by Rocketarium I left the Retro Rebel unpainted. This is a heavy rocket already and Rocketarium says painting may push it over the weight limit for BP motors. I think it looks fine unfinished.
Flight
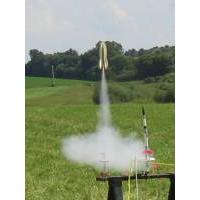
I've flown this once on a B4-2. It flew well with ejection near apogee.
Recovery
Supplied recovery consists of a parachute kit: Plastic sheet marked with hexagons for various parachute sizes, shrouds, and reinforcing rings. The 15" size was recommended and was used. Shock cord is Kevlar with a tri-fold mount. Rocketarium supplies a Nomex heat shield to go over the shock cord.
The heat shield didn't work well for me. The parachute suffered minor heat damage causing it not to open fully. The rocket wasn't damaged however. I would recommend omitting the heat shield and using wadding.
Summary
This is an attention-getting rocket! It drew some admiring comments from several club members. Aside from the motor mount problem which partly was my own fault it went together easily. It flew well, better than you might expect from its weight and draggy design, but a partially melted parachute testifies to the need to improve the recovery system.
 |
 |
Flights
Sponsored Ads
 |
 |


