| Construction Rating: | starstarstarstarstar_border |
| Flight Rating: | starstarstarstarstar_border |
| Overall Rating: | starstarstarstarstar_border |
| Published: | 2013-06-28 |
| Diameter: | 0.98 inches |
| Length: | 22.00 inches |
| Manufacturer: | Estes  |
| Skill Level: | 1 |
| Style: | Sport |
Brief
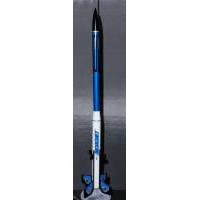
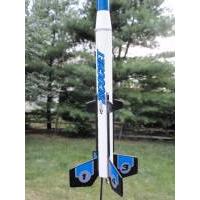
The Estes Ricochet is a low power rocket kit. Although light, at 22 inches high it seems "bigger". It uses 18mm A,B and C motors. I like the military-missile style of this rocket. I enjoyed building this kit and I enjoy flying it because it flies well. Since it is relatively light, it flies to very high altitudes with the larger motors. It also has a large, narrow upper section you can use as a payload if you desire. This was only the second rocket kit from Estes I built since being born again into rockets, so I pretty much followed the instructions to the letter. Now with more experience I do a lot more customization to my kits, but the Ricochet doesn't really need many improvements.
Components
I can usually count on Estes to supply high quality parts, and they did with just a few exceptions. Typically, Estes shock cord and its mounting method leaves much to be desired. It was way too short and after some flights returning with significant cosmetic damage, I added about 2X more length to the stock rubber length of the shock cord.
The parachute was a nice, thick white plastic with no printing, only a note explaining how they temporaraly could not print them due to recent government regulations. That didn't bother me, I was pleased that the material was thicker and a bit sturdy. After a dozen flights I am still using the original plastic parachute, although I cut a spill hole in it and replaced the shroud lines with longer lengths tied to a swivel clip. The decals were excellent, sturdy and they covered well. Estes thoughtfully included a small decal listing the engines to be used on the rocket. That's a smart idea when years from now I may not remember which ones to use. This detail should be required on all kits! I liked that they had decals for all four fin surfaces, lately it seems Estes has been skimping on this and only supplying just enough decals to cover one side as shown on the package.
The body tubes were very good, and I finished my model without any spirals showing at all, even though I didn't bother to fill them. The balsa parts were pretty good quality, the fins and nosecone were fine. The reducer section was a little bit off though, there was a flat spot - a depression on the outside of one side that couldn't be sanded away. It still shows today, and I have since learned to fill in these depressions with wood filler.
Construction
I followed the instructions and didn't have any problem at all with them. The fins are attached in a unique manner, both sets of fins attach to a small square wood strip running up the side of the tube to about six inches. I did however, make a bonehead mistake that is only cosmetic. I attached one of those strips aligned with the exact end of the body tube, not accounting for it being a bit shorter from being sanded too short. As a result one set of fins is about 1/8" further aft than the other three sets, so it sits a little funny on a table. At least that won't affect the flying characteristics. As long as the fins are aligned exactly nose-to-tail it will not create induced drag and waste energy by spinning.
Finishing
I liked the paint scheme suggested and painted my rocket the same, the only exception was that I used a Testor's metalic blue for the top instead of "regular" blue, and I am glad I did, it looks really, really nice that way! Painting all the fins a different color than the body was a bit difficult because of having to mask off all the white areas of the body tube, but it was just another step where one has to take time to get it right, and the results were worth it. The finished black/white and metalic blue looked so nice I enhanced it a bit by painting silver rings around the top ends of the body tube for a little accent.
The upper colors of blue and black were easy to paint because the nosecone and the upper tube can be seperated and painted seperately. To do that, you must ignore Estes instructions to glue the upper body tube to the balsa parts. It is just as easy to glue them on after the painting is finished. In my case, I just treated it as a payload section and friction-fit the parts together with masking tape on the balsa shoulders. I use the top section to carry a small altimeter. Gluing it together seems like such a waste of space to me.
If I had to do it all over again, I would sand and seal the balsa fins before attaching them to the tube just to make the process a bit easier.
Construction Score: 4
Flight
I did a string-stability test on this model. To get it to pass with a C6 motor, I added 6 grams (about 2/10 oz.) of noseweight screwed to the base of the nosecone. I believe that helps this model balance a bit better and fly straight, while reducing the peak altitudes just slightly under 1000 feet.
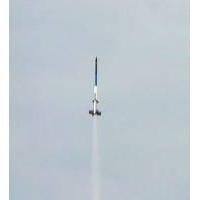
This model flies well. With the low-powered A8-3 motor, apogee averages just over 100 feet, reaching a speed of just under 50mph. Flights last about 12 seconds. With the more powerful B6-4 (in my opinion the best overall motor for this rocket), I get about 80-90 mph and an apogee of 250-350 feet, with flights lasting about 30 seconds. The 4 second delay is about perfect for the B motor. If you want maximum performance, the C6-5 or C6-7 works well, giving me about 700-800 feet and speeds of about 130-150 mph. Flights lasted a bit over a full minute with the C motors.
Descending at about 7 mph, I believe the parachute is too large for C flights, so I recommend a smaller one (10") or cutting a 1.5" spill hole in the chute. You should expect a little better speed and altitude performance without the noseweight and altimeter weight I used. Expect A, B and C motors to deliver about 200, 500 or 1100 feet, so a smaller parachute would be even more necessary if you want the model back.
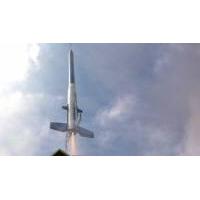
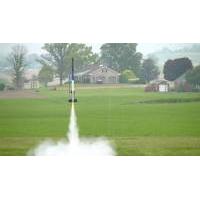
Most enjoyable for me, this rocket is light enough that it accelerates quickly and has never wind-cocked very much. It always flies straight up. It is just large enough to see 1000 feet up.
Recovery
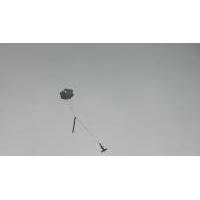
The parachute is about right for this model when flying on A or B motors, though I did add a small 1" spill hole to help it get back from those far-reaching C6 flights. I am fine with using the stock parachute with A and B motors, but I would recommend a smaller chute or spill hole for the C-powered flights. The wide body tube helps to simplify the packing of the parachute and makes it less likely to be stuck inside upon recovery.
What is most definately NOT right is the shock cord length. The upper section snaps back and sometimes takes a nasty bite out of a fin leading edge. I had my somewhat heavy upper section snap back on one flight and rip off one of the smaller forward fins. Fortunately it hung on with a single fiber of balsa and returned with the rocket. Since then I have lengthened the shock cord by about 2X its original length. I recommend doing that with either rubber, elastic cord or Kevlar. While you are at it make a better mount for the shock cord using a Kevlar loop. You can just fray the ends real wide and glue that onto the body tube.
Flight Rating: 4
Summary
The Ricochet is a great flier, filling a good niche between smaller and larger low-power rockets. Expect it to fly well in winds too. It goes up well, but you should address the return with the dimensions of the shock cord and parachute.
As a low-power sport model this is a good choice. It can also be pressed into service lifting small payloads. Construction is about as easy as any 4FNC model out there. The additional length makes it feel like a bigger rocket than it is.
Overall Rating: 4
Other Reviews
- Estes Richocet By John R. Brandon III (July 6, 2009)
A new pseudo-scale military single-stage rocket with SAM appeal. This one was sold at my local Wal-Mart store in a cardboard box. Parts included were a motor mount tube, an engine hook, a long adapter ring, an engine block, a main body tube, an upper body tube, a balsa transition, a balsa nose cone, a sheet of laser-cut balsa fins, four hardwood strips, a launch lug, a screw eye, a 24" ...
 |
 |
Flights
Date | Flyer | Rocket | Altitude |
|---|---|---|---|
Sponsored Ads
 |
 |


