| Construction Rating: | starstarstarstarstar_border |
| Flight Rating: | starstarstarstarstar |
| Overall Rating: | starstarstarstarstar_border |
| Published: | 2012-05-07 |
| Diameter: | 1.18 inches |
| Length: | 14.00 inches |
| Manufacturer: | Quest  |
| Skill Level: | 1 |
| Style: | Sport |
 Brief
Brief
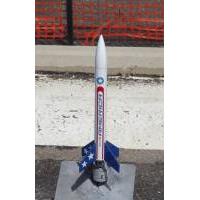
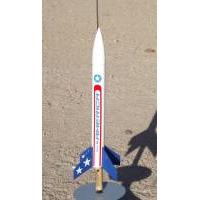
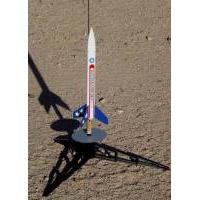
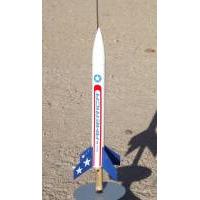
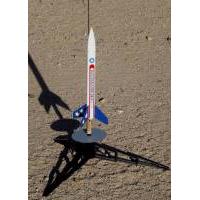
This is a four balsa fin, plastic nose cone rocket. The rocket, when completed, is 14 inches (35.6 cm) long and has a diameter of 1.18" (30mm). It uses the usual 1/8" launch lug for a rocket of this size and uses a 14" plastic parachute for recovery. The suggested paint scheme is all white with blue fins and the recommended motors/engines are A6-4, A8-3, B6-4, C6-3, and C6-5. The package states that flights up to 1200 feet are possible.
Components
The parts listed on the instructions and included in the bag area as follows:
- 1- #11408 30mm tube 9.75 inches long, White
- 1- #20806 Blowmold Nose Cone, White
- 1- #33028 Laser Cut Balsa Fin Sheet (However mine was Die Cut)
- 1- #10303S Yellow Motor Mount Tube w/Slit
- 1- #49000 Motor Mount Clip
- 1- #14000 Blue Thrust Ring
- 1- #10001 2 inch Launch Lug
- 2- #16001 Die Cut Centering Ring
- 1- #82302 Parachute Assembly (14")
- 1- #50051 18" Kevlar Cord
- 1- #50011 18" White Elastic Cord
- 1- #1029-1030 Decal Sheet
- 1- #1020-1010A and B Instruction Sheet
The parts were of good quality. The fins in my kit were die cut, but were ok to work with.
Construction
I thought the instructions were easy to follow. The kit uses a wrap around type fin marking method, so you don't have to stand the tube up on the instructions to mark where the fins are located, just wrap the paper around the tube, tape it and mark the tube where the fins will go. It could have been me, but I think the paper may have been off a tiny bit. The parts fit together well with no problems except for the decals. I had to cut the decal a little thinner for it to be placed between the two fins. Other than that there were no fit issues. The suggested paint scheme is nice with an all white body and blue fins. Since this has balsa fins, they take a little more work than if they were made of plastic. The balsa will have to be sealed and the grain filled in. I used white glue diluted with water and mixed in microballoons (they look like powder) and painted it onto the balsa. When the mixture has dried, sand it down and repeat until the grain is filled. This is just one way to fill in the grain. Some people use diluted Elmers wood filler, or glue paper onto the balsa, so you have your choice on how to do this. If the body tube has deep grooves in it, they too will have to be filled in, and I usually use the Elmers wood filler for this. If you're in a hurry, I guess you can skip filling in the grain and grooves and simply paint it, but it will look better if you take the time to fill it in. After the grain has been filled in and sanded I usually paint it with primer (sometimes it takes more than one coat of primer), sand that smooth and give it a regular paint coat. I used Krylon paint for this rocket. It's very important that you give each coat of paint the proper time before recoating it with another coat of paint such as painting the fins blue over the white paint. If you paint too early the coat will wrinkle. The Krylon can says you can recoat after 48 hours, but I usually wait about a week. I've even had paint wrinkle after 48 hours anyway, so that's why I wait so long. When masking the fin area, I used Pactra masking tape from a hobby shop. Regular masking tape will somewhat allow paint to bleed underneath.
Finishing
The decal did not fit between the fins, and I had to cut some off the sides, fortunately only the clear area, and press them on. I think one of the two stars on the fins is bigger than the other, and I put the bigger one closer to the rocket body where the fin has more space. The instructions go over how to paint the rocket and make the parachute by attaching the shroud lines. I modified my rocket slightly. I tied a fishing swivel at the end of the Kevlar string, and then used 1/8-inch elastic about 2.5 feet long and tied it between the swivel and the nose cone. I also used a 3 inch by 3 inch Nomex parachute protector which is attached to the shock cord; however I still use a few sheets of wadding to help protect the parachute. I took two fishing snap swivels and connected them back to back so there was a clip at each end. One of these was connected to the nosecone, and the other to the shroud lines of the parachute. The swivels allow the rocket or parachute to twist or turn without tangling up the lines as it returns under the parachute. It they do get tangled, you can simply un-snap the lines and untangle them. I replaced the plastic parachute with a 12-inch red-white-blue Nylon one. It's dyed that way from the maker. I figured it would match the paint scheme and the "America" on the side. By the way, the decals stayed on the rocket after applied and did not start to lift up the next day. I like when they stay down. I also like the fact that this rocket body is bigger than 1-inch diameter. It has more room for the shock cord and nylon parachute. The Nomex parachute protector and the 12" nylon parachute came from RocketChutes.com.
Flight
I've flown it twice so far. Both times it flew well and was stable. I've only used the B4-4 Estes motors on these flights and it got some nice altitude for me. One of the recommended motors was the C6-3, but that may be a little short on the ejection charge delay for a rocket of this size. Since I haven't flown it on C's, I can't say for sure. The A6-4 is a Quest motor, Estes makes the A8-3 and they are similar although not exact. Both companies make the other motor sizes.

Recovery
I did not use the plastic parachute that came with the kit. I have used them in other kits with no problem. Some people say a Quest parachute is too stiff, but I personally have no problems with them. With my plastic parachutes, I dust the inside with baby powder so they open up easier. I like the nylon parachutes because they are a little more rugged and they also come in different colors, in my case red white and blue. The parachute that comes with this kit is a 14-inch one, I am using a 12-inch nylon one. It came down nicely with the 12-inch parachute with no damage. With the 14 inch parachute, it may take a few seconds longer for the rocket to return.
Summary
This is a good rocket kit. The body tube is a little larger than the BT-50 or approximately 1 inch body tubes other rockets are using. The larger tube allows a nylon parachute and larger shock cord to be used; it also comes out of the body easier at ejection. It has a nice art design, patriotic so you can make sure to use it around July 4th although you can fly it anytime. The rocket flies well with no problems, but I did not use a C motor. The decal probably won't fit between the fins without trimming it a little bit. That can be a little tricky when you have it in your hand. I trimmed mine with an Exacto knife with a brand new blade. However the decals did stay down and did not lift up later. Other than the small problem with the decal, it was an easy rocket to make, flies well and looks nice. I like mine.
Sponsored Ads
 |
 |
