Modification Estes Quasar from Estes Metalizer Modification
Modification Estes Quasar from Estes Metalizer
Contributed by Bill Eichelberger
| Construction Rating: | starstarstarstarstar |
| Overall Rating: | starstarstarstarstar |
| Published: | 2020-07-29 |
| Manufacturer: | Modification |
 Brief
Brief
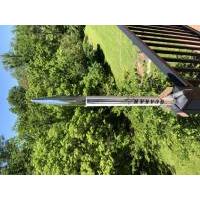
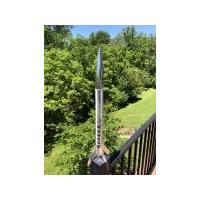
I created an upscale Estes Quasar from the currently available Estes Metalizer kit.
Components
- Estes Metalizer kit (Hobby Lobby)
- BT-56 body tube (Red Arrow)
- Mylar tape
- QUASAR decal (HP Inkjet)
Construction
The Metalizer is an E2X kit that I normally wouldn't bother with except that a) it was on clearance, and b) I was bored and needed a project. The Hobby Lobby racks were a pretty desolate place that hideously rainy Friday of my hideously rainy vacation, and I was just about to give in to despair when the Metalizer's chrome nose cone caught my eye. By the time the clearance sticker caught my eye I already had the Quasar XL plan forming in my mind. In my mind the plan called for a pearl white glow for the budy tube, so I added a can of pearl white lacquer to my haul and headed home to begin construction.
Construction consisted of finding a piece of BT-56 and cutting it to 10.7" length. There is no engine tube. It's all a part of the E2X fin can. I painted the body tube first, then glued the fin can together with the good Testor's plastic cement. (After first scraping the chrome off of the tang on the fin can.) Recovery would be handled with the traditional Estes tri-fold mount and a 36" length of 1/8" sewing elastic. I added a launch lug and was ready to fly.
Finishing
Finishing consisted of priming the length of BT-56 with Valspar primer, then pearl white paint. When it was dry I cut a length of silver mylar tape an inch longer than the body tube, then cut that in half down the center, which gave me a nice chrome streak running the length of the body tube. The ends were then folded into the tube and the inkjet "QUASAR" decal was applied over top of the chrome. It's not perfect, but it definitely calls to mind the original, which was all I was hoping for.

Flight
I've
only made one flight with
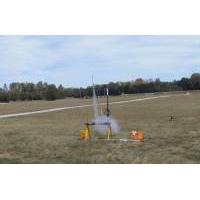
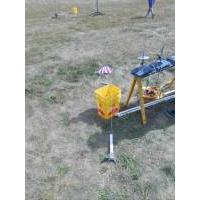
the big Quasar so far, only because I have such a huge backlog of unflown and not flown in x number of years birds in the queue around it. I finally got it in the air at a Wright Stuff Rocketeers section launch the day before my birthday. I had set it up with a B6-4 for flight at B6-4 Field, but the opportunity never presented itself. The B6-4 in this size rocket would have been perfect for my ever decreasing home field. For some reason I never switched it out for a C6-5 on the larger eRockets Field. The Quasar windcocked back over the flightline to around 400', popped the chute at apogee and began drifting back toward the pads. Won closest to the pads on the day when it draped itself across one of the junk bins next to the pad.


Summary
Pros: Easy conversion. Even easier construction. Decent performance.
Cons: Chrome was flaky in some spots.
Related Products
Sponsored Ads
 |
 |
